Flask Webapps: 04
Webapps on Heroku
Part of a series of tutorial articles about Flask webapps.
Outline
- Create a free Heroku account
- Create a free Github account (it not already done)
- Put your existing Flask web app in a Github repo
- Add files needed for Heroku
- Create Heroku Webapp
- Link Heroku webapp with Github repo
- See Heroku webapp live
Step 1: Create a free Heroku account
Navigate to https://www.heroku.com/ and create a free account.
- As of this writing (May 2018), NO CREDIT CARD was needed to create a free tier account that can create up to five webapps.
- If that changes, please let me know.
- You should not need to enter a credit card for any of the activities in this tutorial or the ones that follow.
Step 2: Create a free Github account (it not already done)
If you don’t already have a github.com account, create one now at https://github.com. If you do have one,log into the https://github.com web site.
Step 3: Put your existing Flask web app in a Github repo
If you don’t already have your existing flask web app in a public github repo, upload it to a github repo.
The steps to do that are covered at the series of github lessons that can be found here: https://ucsb-cs8.github.io/topics/git/
You need the Flask webapp in a public github repo before you can deploy it to Heroku.
Step 4: Add files needed for Heroku
To deploy on Heroku, you need two additional files:
Procfilerequirements.txt
Here’s what goes in those files:
Step 4a: Creating a Procfile
We need a file called Procfile in our git repo. This file tells Heroku what to do with our github repo when we push it to github. It should contain the following:
web: gunicorn hello:app --log-file=-
The part of this line that reads hello:app assumes that the main python code for your web app is in hello.py, and that the variable app is the one that appears in the line of code app = Flask(__name__).
If that is not the case, you may need to adjust either hello or app as needed.
Now that we have that file, you will want to do these commands to commit this file to our github repo.
git add Procfile
git commit -m "Added Procfile needed by Heroku"
git push origin master
Step 4b: Creating requirements.txt
We also need a file called requirements.txt which is a list of the Python modules that are needed for our Heroku flask application.
This file will list all of the Python modules that we may have installed using
pip install --user blah, including flask, and anything else that flask might have required.
Note that before you do the next step, you should do the following pip install command if you haven’t already. While this next line isn’t necessarily needed for running Flask applications locally, it is needed for Heroku.
pip install --user gunicorn
We can create the file requirements.txt with this command:
pip freeze > requirements.txt
We now have a list of packages our program needs to run.
Go ahead and save that file, and now lets push that to github as well:
git add requirements.txt
git commit -m "Added list of Python modules needed by Heroku"
git push origin master
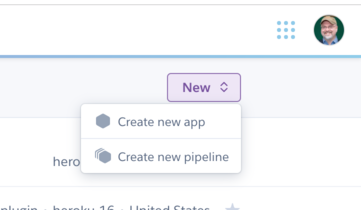
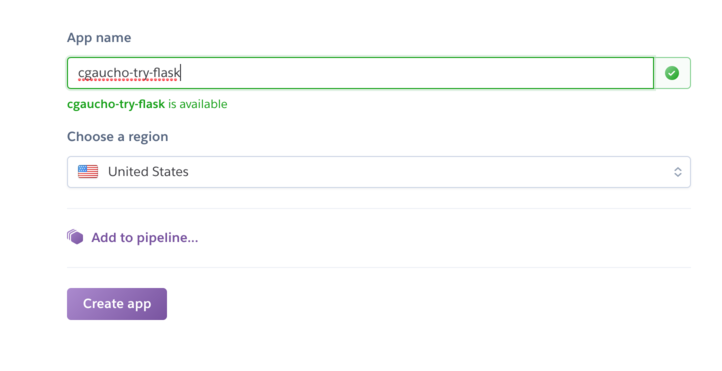
Step 5: Create Heroku Webapp
Go to the https://heroku.com website and login. Then select the option to create a new app:
Then enter an app name.
Step 6: Link Heroku webapp with Github repo
To link the app with a Github repo containing a Flask app, do the following.
First, go to the “Deploy Tab” in the Heroku app
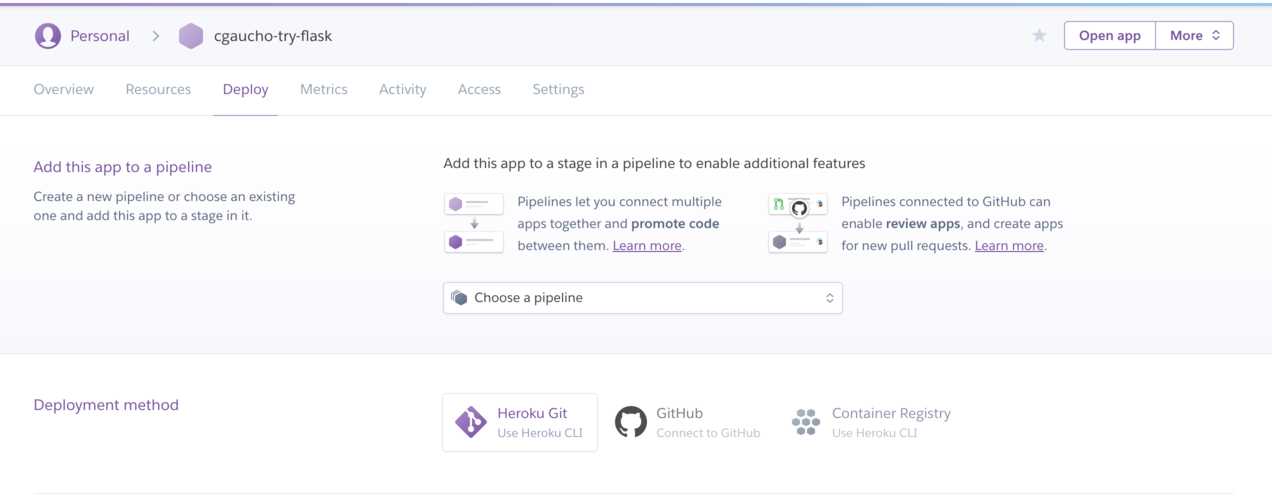
The select “Github” as the deployment method. Link your Heroku app with the github repo containing the code for your app.
Then to deploy the app, select “Deploy Branch”.
- If you are fairly new to using github, you’ll probably only have a “master branch” in your repo, so you’ll deploy from the master branch.
- If you are a more experienced github user, you can choose any branch of your repo as the one to deploy from.
Step 7: See Heroku webapp live
TBD
The next lesson
The next lesson is Web Apps Intro (part 5)
Flask webapps tutorials: table of contents
| Section | Code (github repo) |
Topics Covered |
|---|---|---|
| Flask Webapps: 01 | Getting Started | |
| Flask Webapps: 02 | ftoc (from url), and intro to templates | |
| Flask Webapps: 03 | Better Navigation on your Web App with Nav Bars | |
| Flask Webapps: 04 | Webapps on Heroku | |
| Flask Webapps: 05 | Deploying an existing Flask App on Heroku | |
| Flask Webapps: 06 | Working with Sessions in Flask |